CAGED stands for the five open chord shapes C, A,
G, E and D that most beginning guitarists learn
first. Each of these shapes can be moved up the neck with a barre and then produces
the same chord at a different spot on the fretboard.
Line up all five shifted shapes one after another and they overlap seamlessly and
cover the entire fretboard – the sequence C → A → G → E → D → (back to C, an
octave higher) keeps repeating. The CAGED system helps you
recognise the same notes and chords in different positions, find your way
around the fretboard and later also line up scales and solos along these
familiar shapes.
This roadmap gives an insight into the CAGED system and explains some of the background behind it.
Beyond that, the roadmap is meant to help you connect basic music theory with the
CAGED system on the guitar.
🎓
To explore the CAGED system further, we recommend
the CAGED Explorer →
01
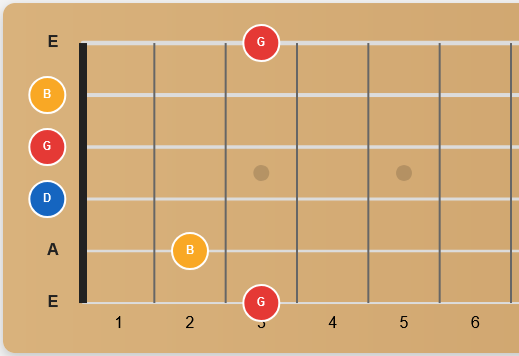
The E shape – root on the lowest string
In the E shape the root sits on the lowest string – in standard tuning, the low
E string. Like all shapes in the CAGED system, the chord shape can be moved with a barre
across all frets and thus applied to any note on this string.
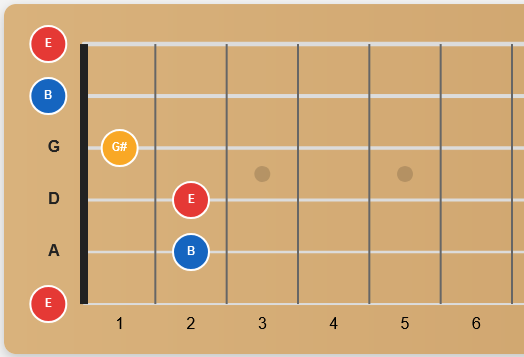
E major chord
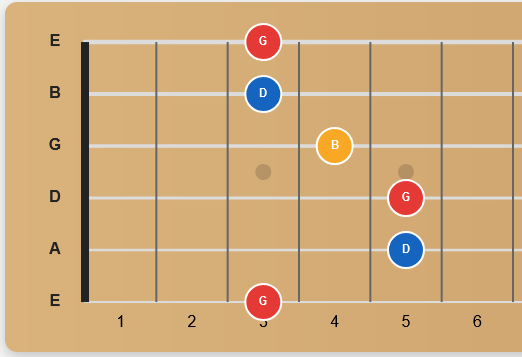
G major chord in the E shape as a barre
02
The A shape – root on the A string
In the A shape the root sits on the second-lowest string, the A string. So if you want
to play a chord with its root on the A string, this shape is the one to use.
This chord shape too can be moved with a barre across all frets and thus applied to any
note on this string.
The note on the A string is the fourth of the note on the E string; conversely, the note
on the E string is the fifth of the note on the A string. The two are therefore directly
related and often appear together in many pieces of music.
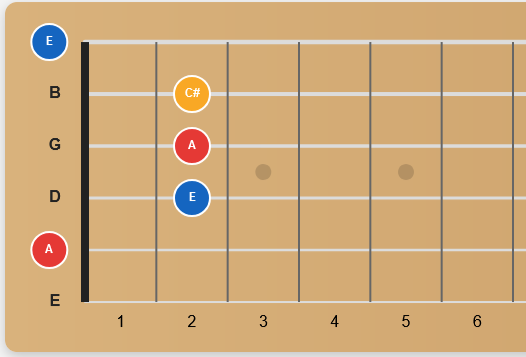
A major chord
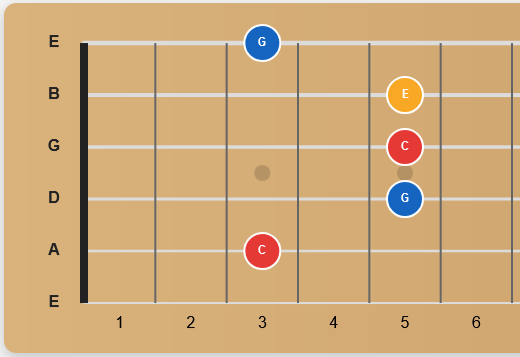
C major chord in the A shape
03
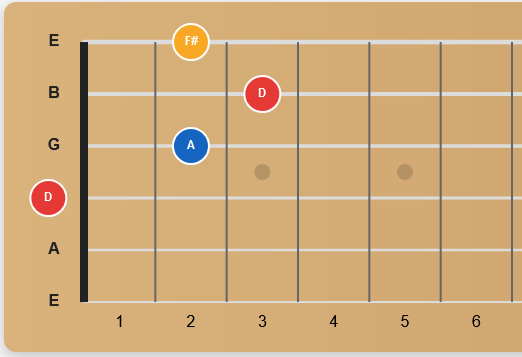
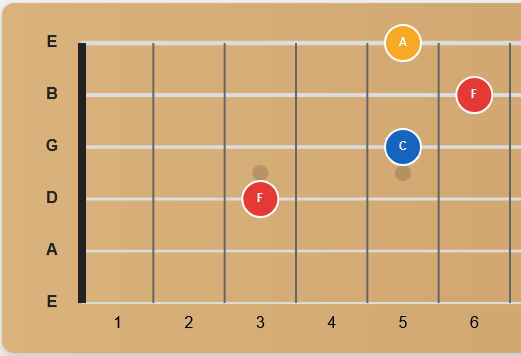
The D shape – root on the D string
In the D shape the root sits on the third-lowest string, the D string. So if you want
to play a chord with its root on the D string, this shape is the one to use.
This chord shape too can be moved with a barre across all frets and thus applied to any
note on this string.
Between the D and A strings the same fourth/fifth relationship applies as before between
the A and E strings: the note on the D string is the fourth of the note on the lower A string,
and conversely the note on the A string is the fifth of the note on the D string. The A and D
strings are thus closely connected.
D major chord
F major chord in the D shape
04
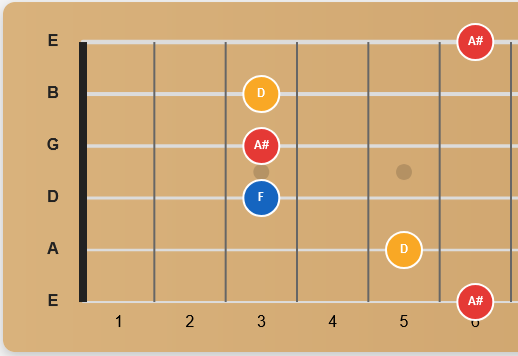
The G shape – root on the G string
In the G shape the root sits on the G string – again one string higher than in the D shape.
If you want to play a chord with its root on the G string, this shape is the right form.
Like the other shapes, it can be moved with a barre across all frets and thus applied to
any note on the G string.
Between the D and G strings the same fourth/fifth relationship applies once more: the note
on the G string is the fourth of the note on the lower D string, and conversely the note on
the D string is the fifth of the note on the G string.
G major chord
A# major chord in the G shape
05
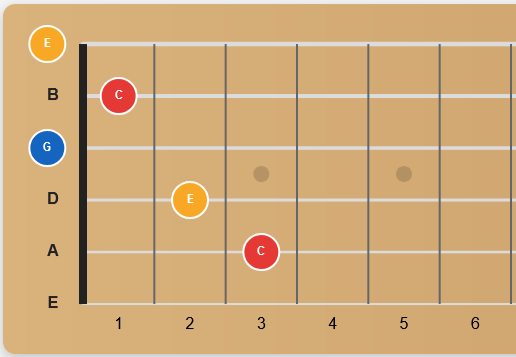
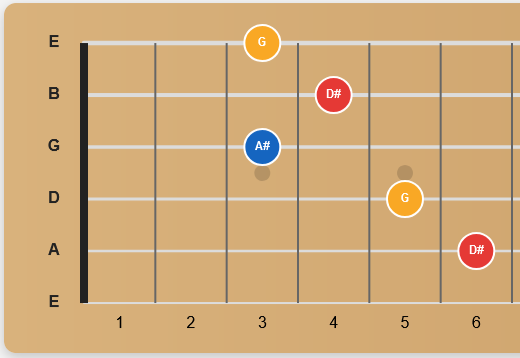
The C shape – root on the B string
In the C shape the root sits on the B string (in Germany often called the H string) – the
next string up after the G string. If you want to play a chord with its root on the B string,
this shape is a good choice. This shape too can be moved with a barre across all frets.
There is a peculiarity here, though: unlike all the previous string pairs, the G and B strings
are not tuned a fourth apart but a major third. The note on the B string is therefore the major
third of the note on the lower G string. This one exception in the guitar tuning is the reason
why the fingerings shift slightly from the B string onwards – and why the C shape is fretted a
little differently than the previous forms.
C major chord
D# major chord in the C shape
The circle closes
Above the B string comes the high E string – and for it the E shape applies again, the one the
roadmap started with. The five forms E, A, D, G and C thus cover the entire fretboard seamlessly
and flow into one another.
Once you have internalised the relationships between the strings – usually a fourth, in one spot a
major third – you will find the same chord in every position from then on.